Pulley injury taping
Maybe one of the worst things in rock climbing is suffering from a pulley injury. It sucks pretty bad, not only because it really hurts, but it forces you to take a break for a pretty long time. If you don’t carefully attend to this kind of injury, climbing won’t ever feel the same again.
A short story from my experience with a banged pulley is that I couldn’t properly climb for a couple of months because I didn’t give it time to heal, and my ring finger took A LOT to heal. Only after over six months of rest my finger feels normal again.
Now, looking back, wearing some tape for support would have been a good idea, but taping my finger to accelerate healing would have been even better!
One of the most common serious injuries in climbing is a pulley tear. A so-called A-type injury comes from the annular pulleys. This represents the soft tissue that holds the tendon to the bone. The annular pulleys are used in actions for pulling and crimping. An A-type injury will affect more often campus board lovers and crimp climbers.
Another less common type of injury is a C pulley tear. This type of injury refers to a series of cross-shaped pulleys that keep your A pulleys into tendons during finger flexion.
These types of injuries can usually occur when we don’t have a proper finger warm-up or if we apply too much pressure, as happened to me on a missed dyno.
There are two popular taping methods for treating a pulley injury (and for tendonitis): the H method and the X method. They both work wonderfully and have a couple of pros and cons, so whichever you choose will be helpful and offer you support so that you can carry on climbing.
The H method
The H-type finger method is the most popular for tendon and pulley injuries. It offers a good amount of flexibility while giving you great support. Dr. Andreas Schweitzer's research, 'Biomechanical effectiveness of taping the A2 pulley in rock climbers,' suggests that it can increase the load to failure, aiding in preventing further tendon injury.
This method is used when large pressure is exerted on the A2 pulley, helping you prevent tendonitis and further injury.
For an H-type taping job, you’ll use a wider strip of tape that needs to be cut down the middle until you hit the center. After doing this on both sides while keeping the middle intact, place the center of the tape onto the injured area while wrapping two other pieces of tape, like rings, at the ends.
Below is an excellent tutorial from Adidas showing how to do this:
The X method
Preferred by climbers who want more flexibility, the X-taping method for climbing provides less support but more flexibility than the H-taping method while keeping your pulley injury in control.
The X method is more effective in offering support on the C-pulley systems but will work great if you are looking just for prevention while projecting. Compared to the H system, the fun part about the X method is that you can make the X wherever you want or need more support.
Compared to the H method, the X is easy to apply, as you don’t need scissors. You will need one long piece of tape placed in the shape of an X over the affected area. Because this method uses only one strip of tape, you will have to wrap the ends like rings.
Below is a great video from Dr Annie Leavitt, PT demonstrating exactly how to apply X tape:
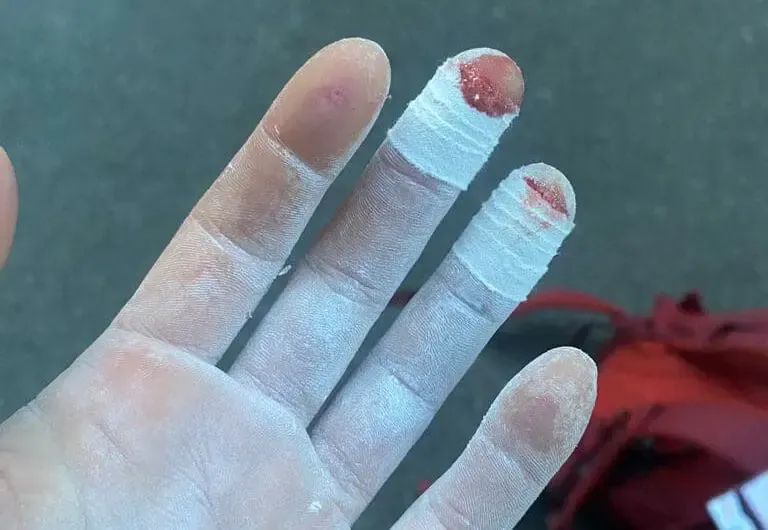
Split tips and raw fingers
Crimp climbers know it best! Split tips and raw fingers are the curse of rock climbing, as they can bring your session to a halt even though you still have some juice left in your muscles. While it is not as severe as torn pulleys or tendons, skin damage requires a few days of rest before you can get back on the wall, so a layer of tape will give you extra time to climb.
To treat raw fingers, you can start by applying a thin strip of climbing tape to the tip of your finger. Run the tape from the tip of your finger to the top of your middle knuckle, wrapping around the finger in an 8-figure pattern until it’s fully taped.
This same method is very useful for finger flappers, the bane of beginner climbers who don’t have strong skin, such as more seasoned climbers.
This video from Tom O'Halloran gives a great demonstration of how to do this in this video:
Palm flappers
The palm flapper is one of the most common skin injuries in climbing. It’s natural, especially for newcomers.
After rubbing your palms on the grippy gym holds, you will sooner or later experience the fierce palm flapper. A nasty stinger that may or may not mean the end of your session. Luckily, with a few pieces of climbing tape, you can extend your climbing day even if you just ripped a piece of your skin on the wall.
Now that you have a small dangling piece of skin hanging from your palm, some climbers say that it’s better to leave it there and apply the tape over it, while some consider that cutting (NOT RIPPING) it off on the spot is better. Because chances are you’re going to be in a bouldering gym or a dusty crag, I think you are much safer leaving the piece of skin there until you get home and attend to it properly.
After you wash thoroughly and dry your palms, it’s time to get your tape game on! You’ll need a long strip of medium-width tape, which you’ll wrap around the base of your finger closest to the flapper. The middle of the tape will come at the base of the finger, and then you’ll make a loop that pulls it back to the palm. The next move is to place the two sides of the strip over the area where your flapper is. Keep in mind that you must put a non-sticky pad over the wound until you place the tape strips. After you tape the flapper, take the strips back to the other side of the palm and secure them around your wrist with a tape ring.
This excellent video below from Dr Q shows you how to do this:
Which is the best climbing finger tape?
Finger tape comes in many shapes and sizes, and naming a specific brand is almost impossible. The best climbing finger tape is sticky and grippy, and it interacts best with your skin. Personally, I always have a backup roll of medical textile tape in my gear bag in case I run out of skin or tape, and it does a great job when there’s no other option.
Therefore, you should experiment with as many brands and materials as possible until you find the best one for you. You can take a look at our climbing finger tape selection; it’s a good starting point.
Until you get your taping game on point, it’s a good idea to get some cheap tape and experiment with the different styles and techniques so you won’t have unpleasant surprises at the wall.
Some final advice
A good piece of advice is also to get the quantity straight because less is more when it comes to taping your fingers for climbing. Large amounts will decrease your sensitivity and will probably do more harm than good.
Also, keep in mind that finger tape is not a panacea for climbing injuries. Check out our guides on how to prevent finger injuries and how to look after your hands, as prevention is a better strategy in the long run. Climbing without tape is much more fun than having your hands tied up like a bouldering Frankenstein!