Bouldering holds: Ultimate guide and how to master them
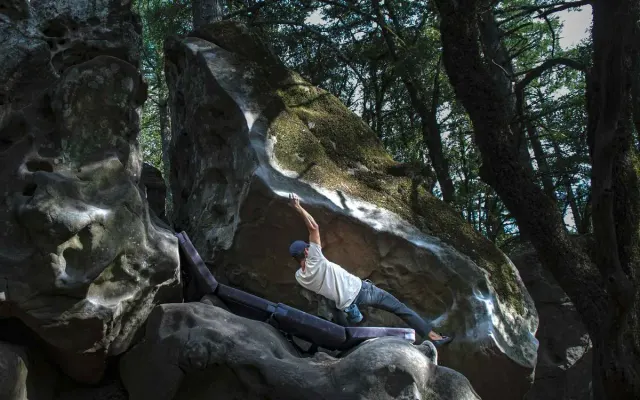
Jugs

Jugs are the most positive of all climbing holds and often the easiest to handle, as they provide the most secure and comfortable gripping surface for a climbing hand.
They are normally large, deep holds that offer a lot of surface area that you can wrap your whole hand around. Sometimes you see them in the form of handlebars.
They are called jugs as they are likened to holding the handle of a pouring jug. You may sometimes also hear them also being referred to as ‘buckets’.
They are very popular for beginners and warming up as you can use a full hand grip on them, so they won’t strain your fingers and mean you can concentrate on learning how to use your feet correctly.
It’s not always clear whether a hold is a jug but the unwritten rule is that if you can hold it comfortably and the person you are climbing with can’t…then it is definitely a jug.
How you feel when you see a jug:
Top tips for jugs
Jugs make it tempting to climb using raw strength alone and you often see beginners still managing to power through some routes using strength alone but then progress slowly as climbs get more difficult.Proper climbing technique is much more important than strength and below are some top technique tips for using jugs effectively:
1. Ensure body is positioned to reach the next jug comfortably - this could involve moving your body weight or feet to different positions
-
Ensure balanced before reaching for the next jug - also try turning your hip into the wall with the hand you are reaching with for a little extra reach
-
Grip jugs firmly and engage your muscles to pull up - make sure you have a firm grip and use your upper body muscles to pull up whilst using your legs and feet for stability
-
Rest where you can as you progress through the climb - when you are comfortable on a jug make sure to use it to rest strategically to regain energy and take time to think before making your next move
Health warning for jugs
Jugs are commonly used in climbs that include powerful and dynamic moves because of their excellent gripping capability. However, the friction from gripping hard can cause the skin to rub on the hold and lead to flappers.To minimise the risk of flappers:
- Keep a close eye on your skin
- Take a few minutes rest between attempts
- Don't have too many attempts on the same move
Training for jugs
To improve at jugs, focus your training on core strength and flexibility exercises.Crimps

From one of the easiest holds to use to one of the most challenging types of holds…the crimp!
Crimps are small, positive edges or ledges that restrict your grip to the first two sections of your fingers.
The smaller, narrower and less positive the surface of the crimp is then the harder it is to use.
Crimps can be extremely narrow. When they are less than half a finger pad you may hear them called ‘credit card crimps’.
The term crimp originates from metalworking, where crimping involved creating small bends or folds in metal to provide additional strength and rigidity. When crimping, a climbers fingers create a bend in their joint to grip the hold, which therefore resembles the small bends or folds in metal. History lesson over…
There are 3 main ways of gripping a crimp to be aware of and when to use each:
1. Open crimp

To open crimp, hook the first joints of the index, middle and ring fingers over the hold and take off your little finger. Ensure your finger joints are straight, drape your hand down on the wall and use friction and tension to grip the hold.
This is the safest type of crimp as minimises the stress on tendons and is also useful for saving energy, so should be used wherever possible.
An open crimp can also be known as a ‘drag’ or ‘hang’.
2. Half crimp

To half crimp, the middle joint of the finger should be bent but the outer joint is straight.
The index, middle and ring fingers should be all bent at 90 degrees. The little finger may be straighter depending on finger length and your thumb should rest next to the index finger or pinch the side of the hold if possible.
Half crimps should be used instead of open crimps when:
- Crimp holds or edges are too small, sloping, flat or in-cut
- On difficult moves where more traction is required
- Where positions are demanding and more stability is required
- Half crimp use more muscles than an open hand crimp but allows for a higher exertion of force.
3. Full crimp

Full crimps are useful on very small holds or in-cut holds as:
- Maximises the contact area of your fingertips with the grip and therefore friction on the hold
- Angle of the finger joints may be in a better position for exerting more power on hold
Bolt on hand holds in gyms today are much more aware of this and user friendly than they use to be. Therefore, half-crimp should be strong, safe and comfortable…even on the most evil of crimps.
A variation of the full crimp is the closed crimp, where the thumb goes over the nail of the index finger to create even more tension on the grip. Be aware thought that this can cause damage to your tendons so should only be used when absolutely necessary.
Top tips for crimps
Plan your route - evaluate all the holds and think about the best angle and body position to grip each crimp hold and what type of grip you plan to use to minimise risk of injuryKeep your body close to the wall - as it allows efficient movement, makes it easier to use your feet, reduces stress on your fingers, improves your reach and increases stability
Keep a close on finger fatigue - if you notice tired or unusual feeling in your fingers then take a break or stop completely
Control movement - sudden movements can put a lot of strain on your fingers so move deliberately and smoothly between crimps, using your body position and weight distribution wherever possible
Health warning for crimps
Crimps put a huge strain on your fingers and tendons so have a high potential for injury. Poor technique and/or overuse can lead to nasty finger injuries relating to pulleys, cartilage, bones and sinew. These that can put you out of action for many weeks or even months in severe cases.Beginners and children should try to avoid crimps where possible until some base finger strength has been developed to minimise the risk of injury. It is simply not worth risking a long layoff from climbing and picking up a long-term injury.
Once some base strength has been developed then stick to open crimps wherever possible, use half crimps only when necessary and full crimps rarely knowing the risks involved.
Training for crimps
To improve at crimps focus your training on hangboard workouts. Hangboards are not for beginners and gradual progression and controlled workouts are required to minimise risk of injury.Slopers

A sloper is a smooth, round hold with little or no positive edges.
You’ll generally either love them or hate them but the sooner you get comfortable with them the better.
Slopers are all about friction. Beginners should start with slopers that are more positive to grip first and progress from there.
To use slopers, first look for the best part of the hold and then grip them with the entire surface of the hand. Pinch hard and then drag your palm and fingers pads over the hold for maximise friction.
You may come across a small version of sloper that is the same size as a crimp but with no positive edges. This is called a slimper….no one likes those!
Top tips for slopers
Body position is key - beginners often make the mistake of getting high on slopers but you should keep maintain a low centre of gravity, keep your weight directly opposed to the direction of the pull, arms in a straight position and maintain body tension as you moveFind the best part of the sloper - experiment with different hand placements and features of a sloper (like small bulges and dimples) to find the most secure position to maximise contact
Focus on maximising friction - apply even pressure and experiment with different hand position as sometimes a slight twist or rotation of the hand can improve friction
Training for slopers
To improve at slopers focus your training on core strength and flexibility exercises.Pinches

A pinch is a hold that you pinch with your thumb on one side and fingers on the other.
They are usually vertically orientated as otherwise they would probably be easier to use like a crimp or sloper.
They can be narrow or wide and depending on the size of your hand this will make it more or less difficult to hold. In general the narrower the hold, the more difficult it is to grip.
The angle of the hold will also impact the difficulty. If on an overhanging wall for example, it will require significantly more forearm and grip strength to keep your body close to the wall.
Your thumb is incredibly strong so you should use it any time you are able to get it on hold.
Top tips for pinches
Focus on engaging thumb muscles and balanced grip - this will prevent the hold from rotating out of controlStrengthen your thumbs - incorporating thumb strength training in your routine will help maintain secure grip
Engage core muscles - this will help provide additional stability and help distribute weight evenly
Training for pinches
To improve at pinches focus your training on pinch blocks and grip variety in order to develop thumb strength and adapt to different shapes and sizes.Pockets

Pockets are literally holes that you stick your hand and fingers in.
They can vary significantly in size and shape. Some are large enough to fit your whole hand in and some are only large enough to fit one finger in.
If you can only fit one finger in, it is called a ‘mono’. If you can only fit your little finger in it is called a ‘pinky hold’.
Pockets also come with different depths, which can impact the difficultly of a climb. Deeper pockets may provide more room for your fingers but can be harder to grip. Shallower pockets often require more accurate finger placement and finger strength.
Slim fingers will have an advantage with pockets from able to fit more fingers in the hold.
Top tips for pockets
Try different finger combinations with 2 finger pockets - if your ring finger is notably longer than your index finger then it may feel more stable to use with your middle finger, if not then the index finger will likely feel more comfortableEnsure your body position is balanced and stable - this will help you stick to the wall and minimise strain from your fingers
Focus on accurate finger placement - play attention to the exact placement of your fingers and on more dynamic moves you can literally point at the pocket for better accuracy (especially if you use your index finger)
Health warning for pockets
Pockets are notoriously the worst hold for causing injuries so:- Warm up thoroughly
- Stop immediately if you feel any tweak in your finger
- Ensure enough rest between attempts and only try a few times
- Avoid monos and pinkys unless you are elite or you are likely to get injured
Training for pockets
To improve at pockets focus your training on finger strength using an open/drag and on different pocket depth variations.Volumes

Volumes are 3D geometric shape features such as cubes, pyramids, prisms and cylinders.
Most modern climbing gyms have flat walls, so volumes allow them to simulate features found on natural rock. They allow route setters to create much more dynamic and interesting routes.
They can be using for gripping, stepping on or even traversing on (moving horizontally).
Top tip for volumes
Get underneath them when gripping them - similar to slopers it is easier to grip them if you lower your centre of gravity directlyUse as much surface area as possible - whether its hands or feet, use as much of possible to maximise friction
Move slowly - when there is nowhere obvious to grip, take your time to find a good hold
Look for edges, bulges or scoops to holds - explore different parts of volumes to find best place to hold and look for signs of chalk as may give you a good idea where other climbers have found good sports
Stand as far from the wall on a volume as possible - creating space makes it easier to lean in and will avoid you pushing yourself backwards
Health warning for volumes
Given the extreme angles on volumes, slipping is common when standing on them and can lead to injury (although most of the time will only minor and a damaged ego). To minimise chance of slipping on volumes:- Maxmise your shoes surface area on the volume for more sticking power
- Make sure your foot is perpendicular to the surface (or as close as you can get)
- Put as much pressure as you can through your toe, keep your heels down and bum out
- Make sure your centre of mass is directly above point of contact
- Brush any excess chalk and rubber off the volume and your shoes
Training for volumes
To improve at volumes focus your training on volume specific techniques, practising smearing and improve balance on textured surfacesFun video
Check out this great video of a climb using only volumes:Underclings

Underclings are hold where you grip them from underneath with the palms of your hand facing upwards. They are basically an upside down jug. You may also hear them referred to as ‘undercuts’.
They are often found on steep walls such as overhangs and roofs and allow climbers to pull themselves upwards against force of gravity or traverse on steep terrain.
Top tips for underclings
Ensure high feet so hold around mid-section - underclings feel poor to hold when they are high above your head so work your feet high to ensure hold is around the mid-section of the body so you can then quickly bring it in close to your torsoAvoid going square on - Going square on requires a lot of bicep strength and makes the next move feel out of balance so always try to turn side on by getting your hip into the wall (if using a right hand to undercling then get left hip into the wall using outside edge of left foot and flag you right leg out to the right for balance)
Pinch the top of the hold - once you have gripped the undercut then pinch the top of the hold to improve tension
Tense core and keep wrists as stiff as possible - this will all your to use more strength and help ensure your posture is stable
Training for underclings
To improve at underclings focus your training on strengthening your core and grip development.Sidepulls

With sidepulls the part of the hold you grab will be facing sideways rather than upwards (jugs) or downwards (underclings).
When you pull on a sidepull you thumb should be pointing to the sky, if it is pointing to the ground then the hold is a ‘gaston’ which is covered next.
The main thing to keep in mind with sidepulls is that they involve pulling horizontally rather than downwards as with most other holds.
Sidepulls can range in size from large volumes to small crimps but it is the orientation of the hold that makes it a sidepull. If the edge of the hold is vertically orientated then there is a good chance is a sidepull.
Top tips for sidepulls
Keep your body close to the wall - when pulling laterally you'll be putting a lot of force on your body that will be taking you away from the wall so staying close to the wall will prevent a barn doorKeep your feet on good holds - the ideal position for your target foothold will be directly below the sidepull at approximately knee height
Avoid going square on - if you are using left hand to sidepull then have you right foot under the sidepull and get right hip into the wall using the outside edge of you shoe with your left leg flagged out to the left
Training for sidepulls
To improve at underclings focus your training on strengthening lats, upper back and upper pectorals.Gastons

A gaston is very similar to a sidepull but instead of your thumb pointing up, your thumb will be point down. Just imagine youself opening lift doors with your hands, you are pulling horizontally but your thumbs are pointing down.
The hold is actually named after a famous french climber Pierre “Gaston” Rébuffat to reflect his mountaineering achievements and contribution to the sport. You may also hear gastons being referred to as ‘reverse side-pulls’ or ‘back-hands’).
Top tips for gastons
Don't leave your feet too low - pick a high foothold to rock-over onto (if you are using a left hand gaston then rock over onto your right foot)Press if next hold a long way away - an additional press of the arm may be required if hold is a long way away but be aware this can put big demands on your biceps
Health warning for gastons
Gastons require a lot of shoulder power to use and dynamic moves into a gaston are one of the best ways to injure your rotator cuff.Training for gastons
To improve at gastons focus your training on core strengthening, grip development, deltoids and triceps.Guppys

A guppy is a hold that pokes out from the wall you can wrap your whole hand arounds sideways with the thumb of the same hand pressing against the fingers so your little finger will be next to the wall.
The shape of the hand resembles the mouth of a guppy fish, hence the name.

This technique can be deployed on small holds, slopers or volumes.
Top tips for guppys
Use them to rest - Guppy alleviate grip strength massively and provide a perfect opportunity to rest in the middle of a tough climbKeep an eye out for the opportunity - a lot of climbers miss them so try to spot them in your route reading
Training for guppys
To improve at gastons focus your training on fingerboard training and grip strengthening.Recommended videos
There are some fantastic videos that go into a lot of detail on these holds and below are our recommended top picks. Please support these content creators by subscribing to their YouTube channels.
Fenrock Climbing Centre — an introduction to climbing holds and how to use them:
Bouldering Bobat — Holds 101, perfect for beginners:
REI — a quick rundown of the main hold types every climber should recognise:
Wrapping up
There are many holds you need to get to grips with (pun intended) but hopefully this article provided the understanding required to get started, useful tips on technique and what training is required to master them.If this article has been helpful or you would like to add anything to help others then please do so in the comments below.
Disclaimer: No article or video can replace proper instruction and experience so please make sure you practice proper techniques and safety guidelines before climbing.